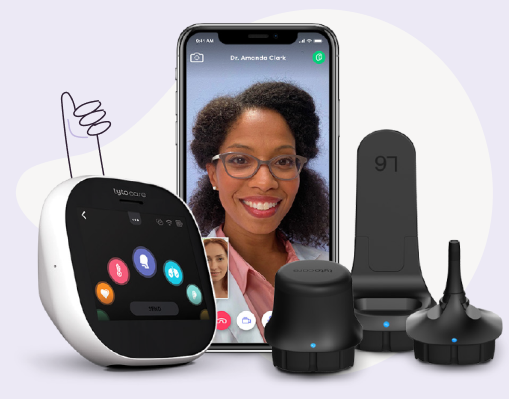
This video will provide you with steps on how to perform online exams using your TytoCare Clinician Dashboard for healthcare providers
To watch this on YouTube just press CTRL on your keyboard and click on the YouTube logo on the lower right part of the window at the same time.
During the Exam
During the online exam, you are in control of the patient’s device. Please guide the patient to direct the iPhone front camera toward his chest to allow you to view the appropriate examination points.
What the Patient Sees
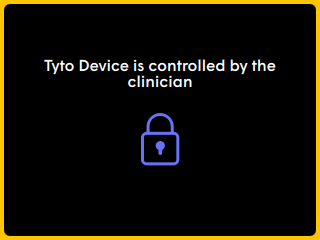
The patient sees that the device is in remote control mode via the yellow indication on their device screen. The patient also sees you on their video conference screen.
What You See
Once you accept and launch the online visit (START VISIT), the video conference begins, and your screen changes to show a video conference with the patient:
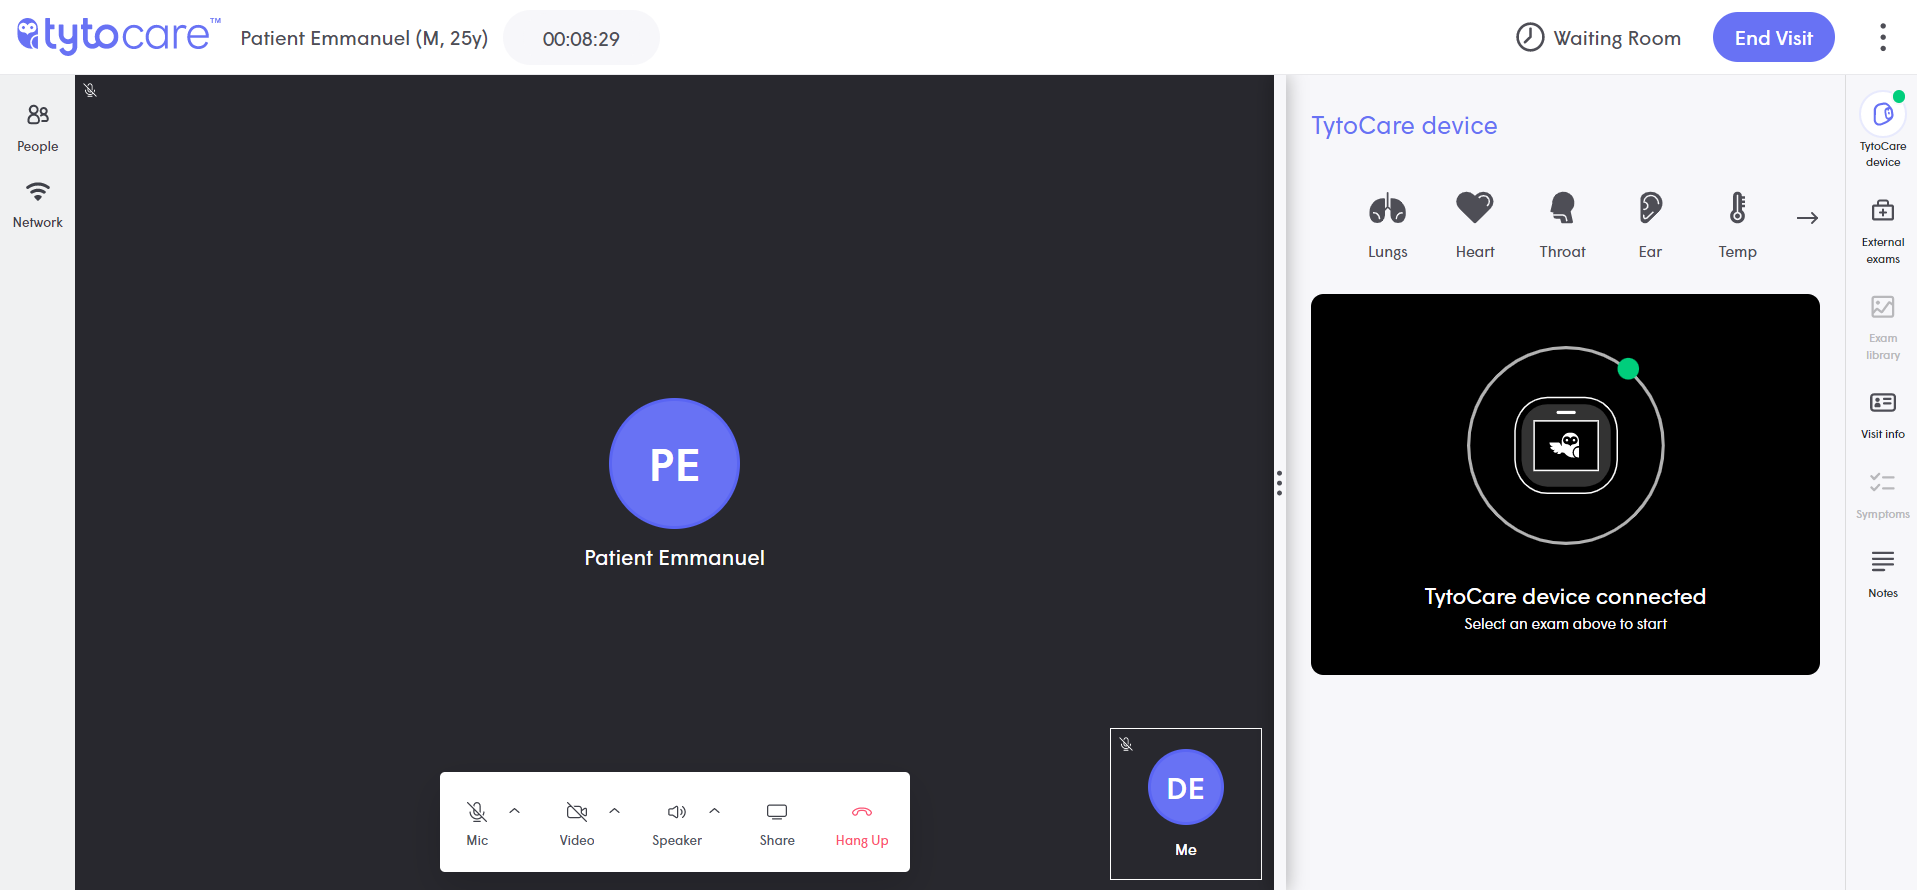
Initial videoconference screen, showing the patient (main area) and the image that the patient sees of the doctor (smaller area)
You can use these onscreen controls during the video conference:

Mic: Mute/Unmute and select the audio input device.
Video: Turn the video on/off and select the camera/video device.
Speaker: Adjust sound and select the audio output device.
Share: Share your screen.
Hang Up: End the video conference.
Note: If the online visit does not start when you press START VISIT, refresh the browser.
Check the Status of the TytoCare Device
To control the TytoCare device, it must be functioning and paired to the patient’s mobile device. If the device is available, a green dot is displayed next to the TytoCare device logo on the upper-right part of your screen.
![]()
Note: If the green dot is not displayed, instruct the patient to check the device and to make sure it is on and paired, as described in the patient’s User Manual.
If the device connection indication remains red, or if you experience issues connecting to the device, or encounter frequent disconnections, please contact TytoCare Support.
Take Control of the TytoCare Device
Select an Exam Type
You may now select an exam to be performed by the patient by clicking any exam type icon on the top part of the TytoCare device screen panel.
Press on the arrow-right icon on the right side of the Exam Menu to see more exam type options:
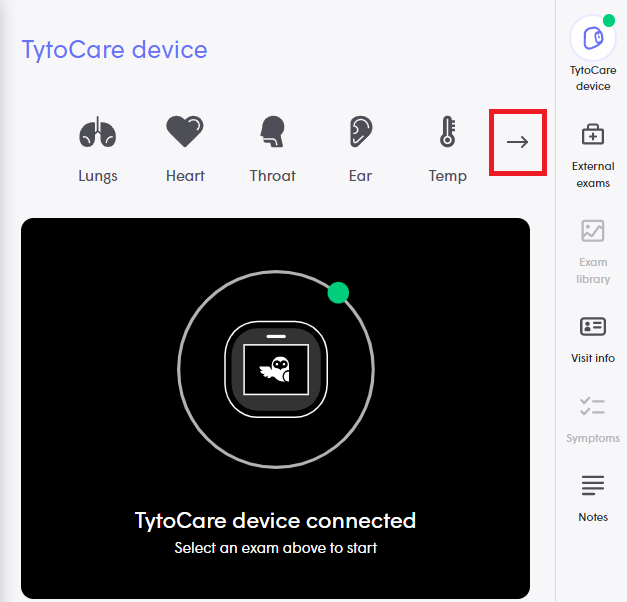
Note: If a device connection error is shown, the patient should check that his device is turned on and not in “sleep” mode. Otherwise, the patient must perform pairing to connect the TytoCare device to his iPhone.
Perform the Exam
You are now controlling the TytoCare Device remotely. You can request the patient to place the device as required, while you perform the examination.
At any time, you can disconnect from the patient’s device and close the online video conference, by clicking on End visit and send notes. You can also end the exam by choosing a different exam, or close the exam without choosing a different exam.
Stethoscope Exams – General Instructions for Heart/Lungs/Heart Rate/Audio
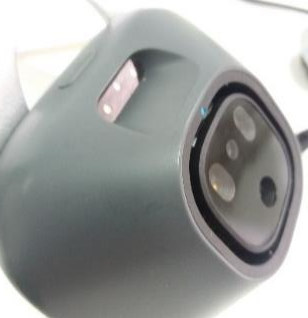
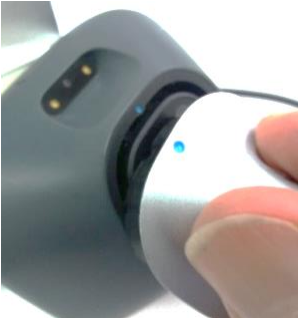
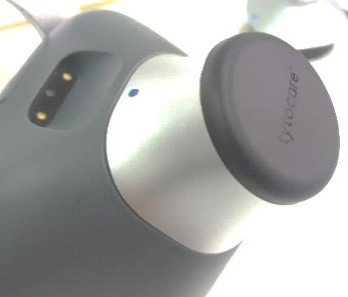
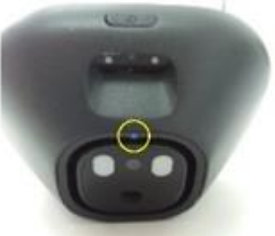
Guidance for the Patient - Instruct the patient to connect the stethoscope tip to the TytoCare device using the blue dot guiding marks:
|
Step 1 |
Step 2 |
Step 3 |
Note: Before each use, as the stethoscope should be placed directly on the skin, use alcohol wipes to disinfect the membrane of the stethoscope (black surface touching the skin).
Headphones
During the exam, the sound is streamed live from the remote stethoscope to the device that you are using. To listen, you must use standard headphones (as described in Clinician Dashboard Requirements) connected to your device. You can always adjust the stethoscope sounds if required.
Auscultation Points
For all exams using the stethoscope, auscultation points are marked on your screen and on the patient’s device. For example, during the Heart Exam, here is what the physician and patient see:
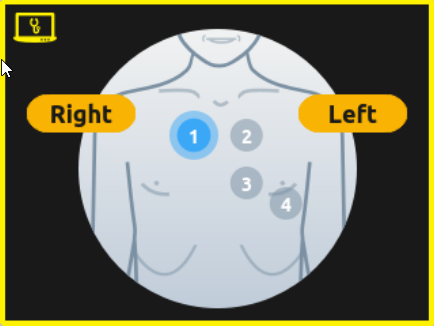
Heart Exam - Patient's TytoCare Device
The Heart Exam’s right pane shows four relevant auscultation points.
You can change the test points by clicking on the appropriate point as the exam progresses, which also changes the indication for the remote patient on the device screen and on the iPhone App. This provides guidance to the patient as to where to place the device on the body.
You may further verbally guide the patient on the exact placement of the stethoscope for each exam point.
You can change audio filters as needed. A filter is preset for the specific exam (Heart & Heart Rate – Bell; Lungs – Diaphragm & Enhanced Diaphragm; Audio – Wide).
You can set a certain filter as default by selecting Set as default, which is displayed on the upper part of the filters list. This will keep the selected filter for the currently selected exam (e.g. if in the Lungs exam, it will save the currently applied filter as the default lungs filter).
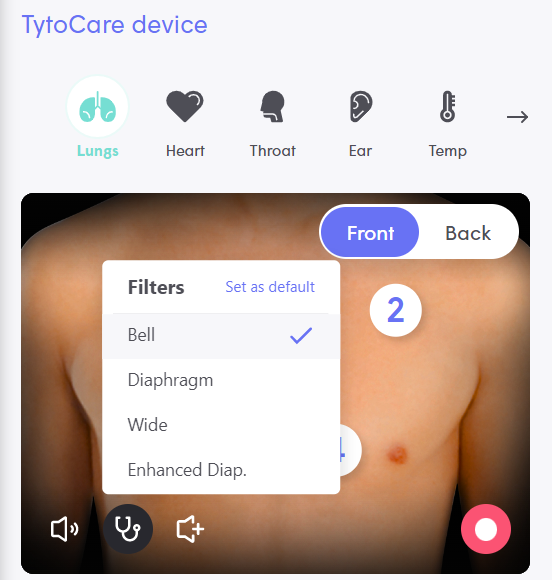
You can increase the sound acquisition of the stethoscope by pressing the Boost icon. The Boost is enabled by default in the Lungs exam to amplify the patient’s breathing sounds frequencies. You can deactivate the Boost mode by clicking the Boost icon again.
You can record sounds by clicking the red record button and then clicking it again to stop the recording. Recordings are stored in the Exam Library and can be played back as needed. You may click the Exam Library icon on the visit tray at the right part of your screen. It is recommended to review the recorded exams through the Exam Library.
Note: Recorded sounds are independent of the network quality. If the live sound from the stethoscope is not heard well and has interruptions, probably due to an unstable network or disconnections, please record the stethoscope sound and listen to the recordings through the Exam Library.
Once you select Heart or Lungs exams and listen to the stethoscope sound, the video conference sound of the patient is muted automatically by the system, to allow you to focus only on the heart or lung auscultation. Note that the patient can still hear you, and listen to your directions. You can still unmute the patient’s video conference sound by pressing the Unmute option in the notification overlay.
Please note that the patient’s Heart Rate is also being measured during the Heart exam. When the Stethoscope measures the heart rate, the result will be displayed on the upper-right corner of the stethoscope panel.
Special Note for the Lungs Exam
The Lungs Exam works like the Heart Exam does, but with the added option to toggle the body orientation between the front and back of the body.
Special Note for the Audio Exam
The Audio Exam is used for general auscultation, for example for bowel sounds. Follow the same general procedures for the Lung exam, as described above.
Online Heart Rate Exam
When performing a Heart Rate exam, there is a single measurement point on the sternum. To measure the Heart Rate, tell the patient to place the stethoscope on the sternum, near the heart, and to keep quiet during the measurement. Then press Record. The measurement will start. Wait until the Heart Rate result appears on the screen, and then you can press Stop.
Please note the Heart Rate is also measured and displayed during the Heart exam.
Online Ears Exam – Using the TytoCare Otoscope
Before use, the patient should clean the Otoscope tip with 70% isopropyl alcohol wipes. Also, they should be instructed to make sure both the lens, located at the front of the otoscope, and the speculum are clean.
Guidance for the Patient - Instruct the patient:
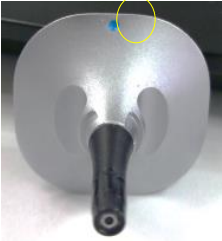
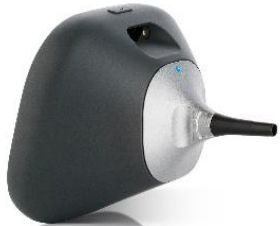
- Connect Otoscope Tip and Disposable Speculum - Before you start using the device, it is important to connect the otoscope tip correctly. Connect the otoscope to the TytoCare device using the blue dot guiding marks:
|
Tyto Device |
Otoscope Tip |
Otoscope Tip and TytoCare Device connected |
|
|
After connecting the otoscope tip, place a disposable speculum on the tip and lock it in place by rotating it. |
Note: Choose the correct size of disposable specula: for adults use the shorter specula with a wider opening (4.0mm), which enables a wider Field of View; for small children use the longer specula with the narrower opening (3.0mm).
Note: Do not use an otoscope disposable speculum that has cracks or contains sharp objects.
Note: Discard the disposable speculum after use.
Note: In case you feel pain or discomfort during the ears exam, stop the exam, retract the otoscope, and update the clinician if you’re using it during an online visit.
Performing the Ears Exam
As the patient moves the otoscope inside his ear canal, your display will show the otoscope video.
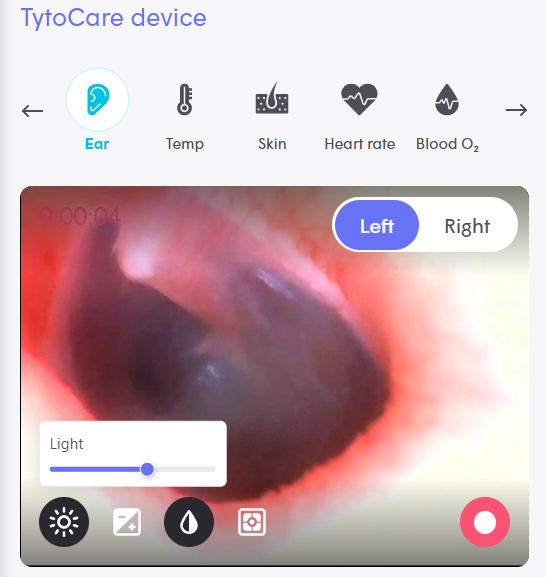
Press the red record icon to start and stop recording. You may adjust the illumination bar to increase or decrease the illumination strength of the LED attached to the tip of the otoscope.
Click the Exposure bar to increase or decrease the sensitivity of the otoscope sensor. When exposure is increased, the image will be brighter. This can be helpful in cases where the eardrum is seen dark, possibly due to cerumen hiding most of the eardrum and seen bright, causing the eardrum at the back to be too dark. Increasing the exposure, in that case, will cause the darker eardrum to be brighter.
Please note the ear exam is limited in time, to prevent heating of the otoscope. You’ll see the remaining time at the upper-left part of the ear video. At 14 seconds remaining, the indication will change to red. Once the ear exam reaches timeout, it will be indicated as follows:
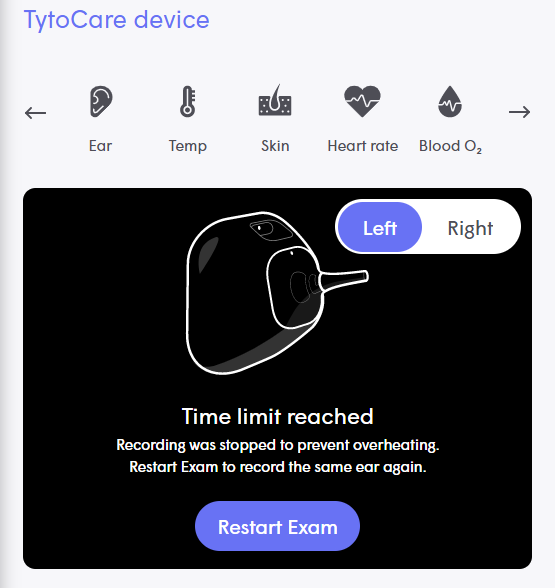
Press Restart Exam to continue the ear exam on the same ear.
Note: Please guide the patient to insert the otoscope slowly into the ear canal, as there might be some latency between the image you see and the location (depth) of the otoscope inside the ear.
Note: Recorded ear videos are independent of the network quality. If the live video from the otoscope is of low quality or has artifacts, probably due to an unstable network or disconnections, please record the ear video and view the recordings through the Exam Library.
Online Temperature Exam
Guidance for the Patient - Instruct the patient:
- Make sure the forehead is exposed, without hair interfering. The patient should be in a relaxed state. Remove any excess perspiration from the patient’s forehead.
- Aim the TytoCare device at the center of the forehead, just between the eyebrows, with a distance of no more than 2 inches (5cm). They will hear a beep after the 7 seconds measurement time.
Note: The Temperature Exam does not require any attachments to the TytoCare device. Please make sure the patient has not connected the otoscope or stethoscope to the device.
Begin the Exam
Press START when the patient aims the TytoCare Device toward the center of the forehead. When the device plays a beep, the exam is complete. You can press RETAKE if you want to repeat the exam.
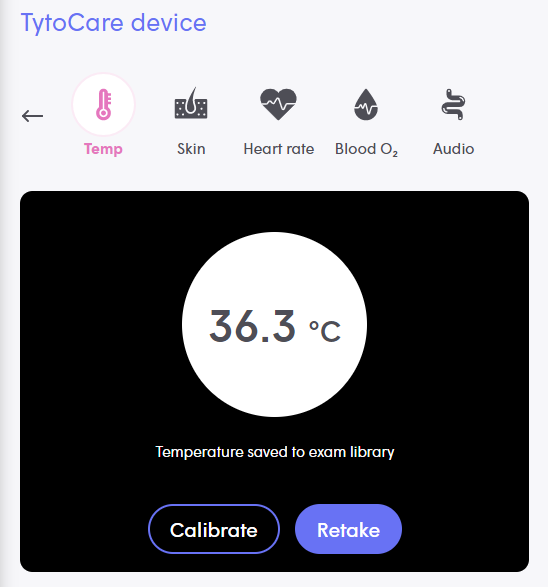
In some cases, for example, if the device was charged for a certain time, the thermometer needs to be calibrated to verify the room ambient temperature, which is needed for best accuracy results.
In that case, the system will prompt you to perform a short calibration process.
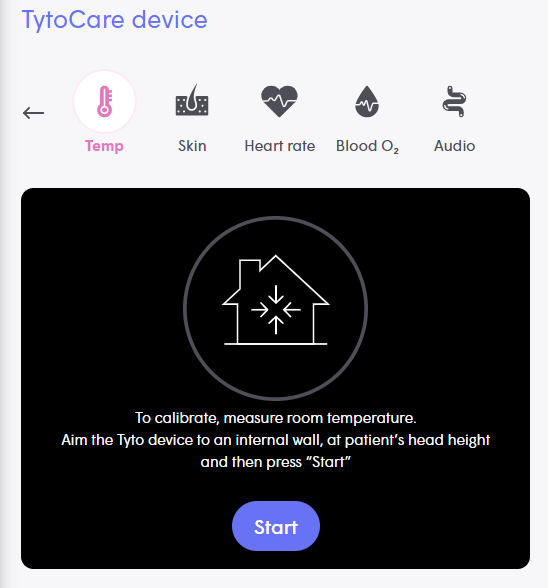
Press Start to start the calibration process. You can Skip the calibration, but this may reduce the accuracy of the temperature measurement.
To calibrate, ask the user, who’s holding the TytoCare device, to aim the thermometer, located at the front of the device, towards either the right area of the plastic tray, which is included in the carrying case or an inner wall in the room.
Once the device is positioned correctly, press Start.
Once the measurement finishes (after about 5 seconds), the measured room ambient temperature will be displayed. You can then continue measuring the patient’s temperature as described above.
Online Throat Exam
Guidance for the Patient
- Instruct the patient to open their mouth as wide as possible, stick out their tongue and say “aaah”.
- Press the red record button to start recording the video. Point camera towards tonsils. When finished, press the STOP red icon to end the recording.
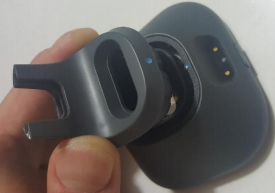
How to connect the tongue depressor:
|
1. Attach the holder connector part to the device socket, following the blue dots.
|
|
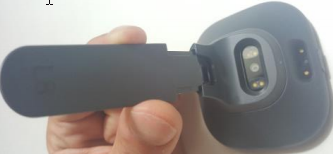
2. Insert the tongue depressor blade into the holder until you hear a locking click.
|
|
3. To detach the blade from the holder, press the locking latch at the bottom of the tongue depressor.
|
Using the Tongue Depressor
If you decide to use a tongue depressor, note that there are two sizes of tongue depressor:
- The adult’s longer tongue depressor blade is marked with “L8”.
- For small children, the shorter tongue depressor is marked with “L6” on the blade.
Make sure the tongue depressor holder and blade are disinfected before and after each use, using a cloth or gauze lightly moistened with 70% alcohol.
Warning: If the tongue depressor disconnects from the tongue depressor holder, for example by the patient biting the tongue – gently pull the tongue depressor out of the mouth, or wait until the patient releases the tongue depressor.
Warning: Do not use a tongue depressor blade that is cracked or has sharp corners.
Note: If you use the tongue depressor, when the exam is complete, release it from the connector by pressing the latch, and then pushing the tongue depressor holder out
Note: Recorded throat videos are independent of the network quality. If the live video from the TytoCare camera is in low quality or has artifacts, probably due to an unstable network or disconnections, please record the throat video and view the recordings through the gallery.
Online Skin Exam
Guidance for the Patient’s Placement of the TytoCare Device for the Skin Exam - Instruct the patient to place the device about 1.5-2 inches (4-5cm) from the skin to allow the camera to focus.
Adjusting the Picture - You can adjust the focus and illumination to get the best possible image.
- Focus: The camera will self-adjust to make the area the optimal focus for the picture.
- Illumination: Adjust the illumination bar to increase or decrease the amount of light emitted by the camera’s LED.
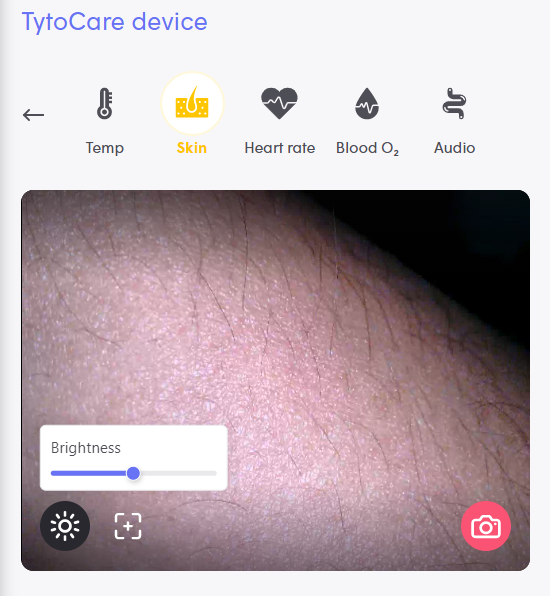
Take a Picture - Press on the red camera button to take a picture. The picture will be added to the Exam Library.
Delete a recording - If you wish to delete an exam recording, go to the Exam Library > choose the recording > click the trash bin icon. A confirmation message will be displayed before deleting the recording. Please note that deletion is irreversible.
Ending the Video Conference - To stop the video conference with the patient, click the blue End Visit icon.
Finishing the Visit - Once you complete the examination, fill in the Notes, located on the right-hand side of the screen. The visit can then be finished by clicking End Visit on the top right part of the screen. Once you end the visit, the patient will automatically receive the visit summary notes on their mobile phone.
Note: The visit cannot be completed until the notes are filled in.
Three-dot menu - Additional options are available on the dropdown list on the top-right part of the screen:
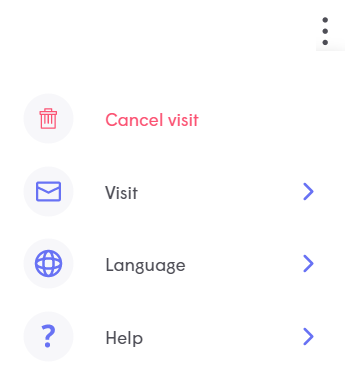
- Cancel Visit – Cancel and end the online visit with the patient.
- Visit – you can transfer the visit to another clinician, share the visit via email, and copy the link to the visit.
- Language – Change the dashboard language.
- Help - You may test your network, check the user guides/tutorials, and contact support button. You may also check the version of your dashboard by clicking "Version info"


